Before you can get started with Xamarin.iOS, whether or not you plan to use Xamarin Forms, you must prepare your Mac for network use. This document will show you how to configure the network, install VNC for remote access, and connect using either a crossover cable or a network hub.
The Connection
I recommend making a hard Ethernet connection to your Mac using a Static IP address. You can either use a network hub or a crossover cable to make the physical connection.
If you use a hub or switch, connect both your Windows machine and the Mac to the hub/switch using standard network patch cables. If you want to avoid the extra hardware, just connect the Windows machine directly to the mac using a crossover cable, a network cable in which the Transmit and Receive wires are crossed. You can get one online at MonoPrice for less than $2.00.
Select an IP Address for your Mac
If you're already using the network port on your Windows machine, you'll have to find an available IP address. If you're behind a NAT router your Windows IP address will be something like 192.168.X.X or 10.1.X.X. That means you need to know what IP addresses are available and which are reserved for DHCP. You can find this by connecting to your router as an admin.
First, we need to find the address of the router. This would be listed as your Default Gateway in your network settings. You can find this by opening a command prompt and typing "ipconfig/all". My default gateway is 192.168.1.1. Connect to this address with your browser ("http://192.186.1.1"), log in as the admin and find your DHCP settings. There will be a range of addresses to use for DHCP. In my case, the range is 192.168.1.2 to 192.168.1.100. That means we can safely use 192.168.1.101 and higher for static IP addresses.
My Windows machine actually has a static IP address of 192.168.1.101, so I will assign my Mac Mini to use 192.168.1.102.
If you're not using the Ethernet port on your Windows machine, you can give it any IP address you like, so long as it doesn't conflict with your current IP address. To be safe, make up something non-standard. Give yourself 100.9.33.1 and give the Mac 100.9.33.2. The rest of this document assumes the first scenario: 192.168.1.101 for the Windows machine and 192.168.1.102 for the Mac.
Windows Network Settings
IP Address: 192.168.1.101
Subnet Mask: 255.255.255.0
Default Gateway: 192.168.1.1
Refer to this document if you don't know how to change your IP address on Windows.
Mac Network Settings
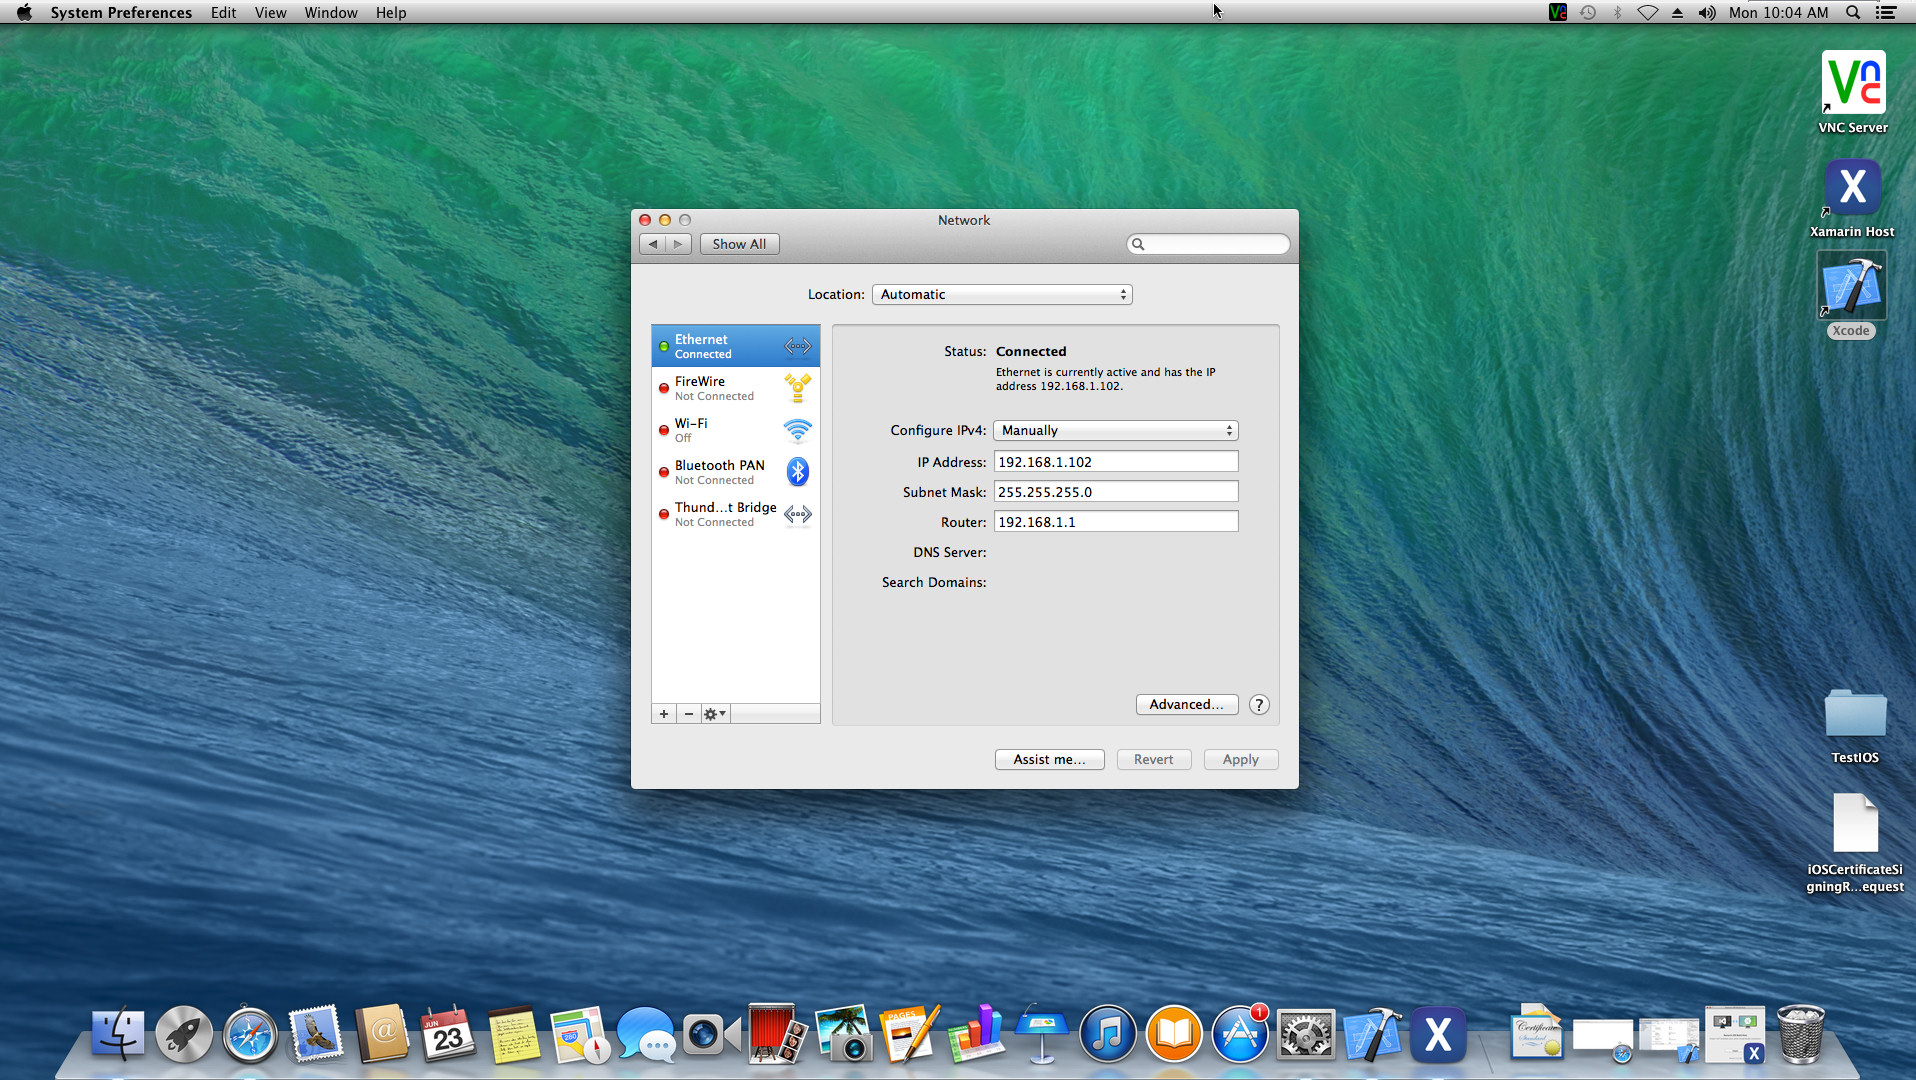
Open up System Preferences on the Mac and navigate to the Network screen. Select Ethernet Connected and enter the following settings:
IP Address: 192.168.1.102
Subnet Mask: 255.255.255.0
Default Gateway: 192.168.1.1
Add DNS Server
Click the Advanced button and navigate to the DNS Tab. Click the + button in the bottom left, and enter 192.168.1.1 (or whatever your Default Gateway address is). Click the Apply button. You are networked!
Install VNC
VNC is a free remote-desktop app with support for every platform. You can get this for free from http://realvnc.com. Go there with Safari on your Mac and download VNC. Make sure you download the complete version, not just the viewer. Follow the installation instructions.
Run VNC Server
Run the VNC Server app on the mac and configure a password from the Options menu.
 click to enlargeOnce you enter a password you're good to go.
Install VNC on your Windows machine, run the VNC Viewer, and enter the Mac's IP address and the VNC password, and you should be able to connect to it.
Now you are ready to rock and roll in the world of Xamarin.
